Friday, September 30, 2011

Stuffed Peppers


From Megan's Kitchen:

Vegetables never really are the most exciting part of the meal. We cook and eat them because we're supposed to, but asked what's for dinner, no one ever responds "Greenbeans! Yay! Oh and bbq chicken". Unfortunately it sometimes even becomes an after thought or an untouched bowl on the dinner table. So what's a good way to get people to eat their veggies? Stuff them full of cheese, rice and sausage. Voila, problem solved.

Stuffed Green Peppers
Ingredients: (I just cook for two so adjust the recipe to fit your serving size!)
1/4 cup uncooked brown rice
1/4 cup + 2 tbsp. water
2 green peppers
1/2 onion chopped
2 tbsp. olive oil
1/4 lb sausage or ground turkey (cooked)
1 tbsp chopped fresh parsley
1 cup tomato sauce
2 oz. mozzarella
Salt and Pepper

Combine rice and water in a small saucepan. Bring to a boil, reduce heat to low and simmer for 15 minutes. Cut tops off of green peppers and clean out the insides.


 Heat skillet over medium heat and saute onions till soft.


 Stir in ground turkey and parsley. Reduce heat to low and cook for 5 minutes.


 Mix in rice and 3/4 cup tomato sauce.


 Spoon mixture into peppers and top with remaining tomato sauce.


 Cover and bake at 400 degrees for 45 minutes. Uncover. Top each with cheese and bake until cheese is melted. Serve.


Wednesday, September 28, 2011

Grilled Bruschetta Chicken


From Megan's Kitchen

I've never really loved to cook. I LOVE to bake, but cooking just doesn't appeal to me in the same way.  Maybe it's because when I cook, I fret about trying to be healthy and make things that taste good, but aren't going to blow my diet. Whereas, with baking, all bets are off. One doesn't bake with the intention of watching their calories...baking means we're going to splurge and we're going to make it worth it. And the outcome of baking simply appeals to my palette a whole lot more :). Imagine that. So, with that being said, my dinners aren't elaborate. I don't do a whole lot of side dishes or multi course cuisines because there is just two of us under this roof eating real people food. My dinners are simple yet delicious (I may be a bit biased) and aren't going to take you all day to make. So enjoy.

Grilled Bruschetta Chicken:
Ingredients
4 chicken breasts (I accidentally thawed chicken tenders so either will work)
1/4 cup KRAFT sun-dried tomato dressing, divided
1 tomato, finely chopped
1/2 cup mozzarella cheese
1/4 cup chopped fresh basil or 1 tsp. dried basil leaves

Place large sheet of heavy duty foil over half of your grill and heat grill to medium heat. Meanwhile, place chicken in ziplock bag and marinate with half of dressing. Refrigerate for 10 minutes (or all day). Grill chicken uncovered for 6 minutes.
*so it may have been raining so going outside to use the grill was not happening. Instead I used my grill pan and it worked out great. It may be a little harder if you have a lot of chicken to grill though!
 

Meanwhile, combine remaining dressing, tomatoes, cheese and basil.


 Turn chicken over and place cooked side up on foil. Top with tomato mixture and close the lid. Grill for 8 minutes.


 Serve.

Monday, September 26, 2011

Halloween Quilt Patterns "Come In For A Spell"


I love Halloween and I love hosting Halloween get-to-gethers from Ladies Luncheons to dinners.  I love any excuse to get the ghoul friends together which just so happens to be the inspiration for this quilt.
Welcome all your ghoul friends in this October with this whimsical quilt.
You can download this quilt pattern


Friday, September 23, 2011

Halloween Creative Foods "Mummy Munch"


Making Mummy Munch:


12 cups popped popcorn (can use store bought buttered popcorn)
One package (12.5 oz. Corn Pops)
1 package (14 oz.) corn chips
2 packages (11.5 oz. each) white chips or 24 oz. almond bark

In two large bowls, combine popcorn, corn pops and corn chips.  In a double boiler melt the chips or almond bark.  Stir until smooth.  Pour over popcorn mixture and toss to coat. Spread in two large cookies sheets and cool. 


The sweet mixed with the salt make this a unique, but tasty treat. 
Once you start munching you won't be able to stop. 
Happy Halloween!

Monday, September 19, 2011

Halloween Food Ideas "Frank Fudge Mound" Cookies


Halloween is just around the corner and I have to admit I love this time of year.  I love naming food Halloween names.  Every night in October we have a Halloween meal (meaning, I make up names to go with whatever I am cooking that night). Sometimes I have to get pretty creative with my names, and sometimes the kids just roll their eyes, but it is all fun and the kids really do love me trying to be creative.  We've had a lot of laughs over the years. 

So here is the first of my Halloween recipes.

Making the Cookies:

2 1/2 cups flour
1 tsp. baking soda
1/2 tsp. baking powder
1/2 tsp. salt
1/2 cup butter, softened
3/4 cup sugar
3/4 cup brown sugar
2 eggs
1 tsp. vanilla
6 tbsp. cocoa mixed with 2 tbsp. oil
1 cup sour cream
1 cup pecans, optional

Whisk together the flour, baking soda, baking powder and salt.  Set aside.  In another bowl, cream butter, sugar, eggs, vanilla, chocolate mixure and sour cream.  Add the two mixtures together. Fold in the nuts.  Drop by teaspoonfuls on ungreased cookie sheet.  Bake at 350 degrees for 12-15 minutes.  Do not overbake.  Cool.  Frost with fudge frosting.

Fudge Frosting:

1 cup sugar
4 tbsps. cocoa
4 tbsps. butter
1/2 cup milk
2 tbsps. corn syrup
Dash of salt
1 1/2 - 2 cups powdered sugar
1 tsp. vanilla

Mix sugar and cocoa in a saucepan.  Stir in butter, milk, corn syrup and salt.  Bring to  boil, stirring frequently.  Boil for 3 minutes, stirring occasionally.  Cool.  Beat in powdered sugar and vanilla.  Frost cookies.  Enjoy!

Friday, September 16, 2011

Sausage Soup

This soup has become a family favorite and so easy to make.

Making the soup:
2 cans or three cups chicken broth
6 medium sized potatoes cut into bite size piece
1 lb sausage, cooked, drained and crumbled
2 cups spinach, cut into strips
1 cup whipping cream
3 cups half and half
1 tbsp. fresh basil, finely chopped (can use dried)
1/2 tsp. pepper
Salt to taste
Bring the chicken broth to a boil.  Add the bite-size potatoes and cook until tender.  Add the remaining ingredients and cook until heated through. Serves 4-6.

Wednesday, September 14, 2011

Ladder Shelf


We put this shelf together for our daughter's wedding reception to display all of her gifts.  After the reception she made good use of it and put it in her adorable kitchen.

We bought two wooden ladders at Ace Hardware, but you could scout around at 2nd hand stores or garage sales for the ladders.  We painted the ladders in two of the wedding colors which were coral and yellow.  We bought three 12" planks of wood and painted them.  We slid the planks of wood through the ladders to create three shelves.  So easy, yet so much fun!


Monday, September 12, 2011

Quilt Patterns "And They Lived Happily Ever After"


It was a magical year for my daughter as she met the man of her dreams and got married. 
We displayed this quilt at her summer wedding. 

What a great heirloom for any little girl.  Make your little princess this quilt, switch out the pictures
as she grows up and then display it at her wedding.

The "And They Lived Happily Ever After"quilt pattern is a revised pattern from the
"Once Upon A Time" Quilt.  We have added the last block that says
"And They Lived Happily Ever After."
Check out our website
for all patterns.


Friday, September 9, 2011

Honey Mustard Chicken Bake


From Megan's Kitchen

How many different recipes do you have for baked chicken? For some reason it is a such an easy/great go-to dinner. So let me add to the plethora with this divine honey mustard chicken. It's quick, it's easy, and come on, how can you not get excited for only 5 ingredients!

Ingredients:
1/2 cup butter, melted
1/2 cup honey
1/4 cup dijon mustard
1/4 tsp. black pepper
4 chicken breast halves


Directions:
Preheat oven to 375 degrees. Spray a 9x13 baking dish with cooking spray and put your chicken breasts in it.


Mix together butter, honey, Dijon mustard and pepper.


 Pour it over your chicken (ok, so I forgot to take the pic until after it was in the oven...not so attractive).


 Put your chicken in the oven and bake it for 45 minutes. While it is baking, spoon the sauce over the chicken about every 5 minutes (or use a baster). Don't worry, I only burned myself twice.


 You can serve this over noodles and rice if you want, but we just had it plain with a side of corn.


I made this last night and LOVED it. Tonight for leftovers, I sliced up the chicken, mixed it in the leftover honey mustard sauce, loaded it between two slices of wheat bread with a slice of provolone cheese, slathered it up with buttered and cooked it on the griddle to perfection. It was delicious. It would also be good served cold over a salad. So many options...that's the beauty of chicken.

Wednesday, September 7, 2011

Lasagna Cupcakes


From Megan's Kitchen

I have a confession to make...I'm a diabetic.

There, I said it.

I found out that I had gestational diabetes back in January when I was 28 weeks pregnant with my first baby, but when it never went away and I got diagnosed with Type 1.5 diabetes.

So, after saying a tearful good bye to all Italian food and most other carb-loaded comfort food (I said MOST because once these fingers wrap around a warm chocolate chip cookie right out of the oven, there ain't no prying them loose. The only way to free that frightened little cookie is to eat it out. Tragic, really.) I settled into my new routine and diet.

This consisted of reading EVERY food label so that I knew exactly what I was eating...truly a terrible thing for someone who LOVES their sweets and ate nothing but fries and chicken nuggets as a wee tot.

Now that you've had a shiny little glimpse into my personal dilemma, you can rejoice with me and imagine how thrilled I was when I stumbled upon these tasty little lasagna cupcakes. All the Italian I've been craving and very few carbs (I'm not saying anything about the calories ladies...don't think you can eat a pan full of these and then blame me when you are hiding some extra rolls in your over-size knit sweater this winter...just kidding, I know you look great :) ).

So now, I present to you tonight's dinner...

Lasagna Cupcakes

Ingredients:
2 cups marinara sauce
1-1/2 lb ground beef (or turkey)
24 wonton wrappers
16 oz mozzarella cheese
6 oz parmesan cheese
8 oz Ricotta cheese

Directions:
Preheat oven to 375 degrees. Spray muffin tin with cooking spray. Brown beef and season with salt and pepper. Drain. Cut wonton wrappers into circle shapes using a biscuit cutter or the top a of drinking glass.4


Begin by pressing a wonton wrapper into the bottom of each muffin tin and then start layering your lasagna cupcakes. 


 Sprinkle a little parmesan cheese, ricotta cheese and mozzarella cheese. Top with a little meat and marinara sauce. I didn't really measure out any of these, I just put how much I felt like. Repeat layers ending with marinara sauce and then topping with parmesan and mozzarella cheese.


 Bake for 18-20 minutes or until golden brown. Remove from oven and let cool for 5 minutes. Loosen around the edges with a knife and Serve.


Tuesday, September 6, 2011

Cookie Dough Cupcakes


 From Megan's Kitchen 
(I love Megan's kitchen!)

I am going to give you easiest dessert recipe ever!  First, you buy a box of cake mix and a package of break and bake cookie dough. Then set your oven to 350 degrees and make the cake according to the instructions on the box. Fill each cupcake 2/3 full...since this is a mind-boggling step, here is a pic:


 Then, you break apart those little break and bake cookies and divvy them out, one per cupcake.
 Then you stick them in your oven, set the timer for 15 minutes and wait for these gooey good treats to reach maximum perfection. They may take a couple extra minutes, but you want the tops to be cracked and set.
Now that these are cooked, they aren't truly complete until topped by some delicious frosting. You COULD just buy a can, fill your cake decorator and go to town making them look fancy BUT then what would you say when someone asks you for your frosting recipe, and you have to sheepishly hem and haw while blocking their view of the empty frosting can peeking out of the trash can trying to give you away? Or worse yet, they bite into this gooey goodness and immediately know your a fraud...I know it's ironic that I'm going on about this when I just revealed a recipe containing two store bought, pre-made, fully processed ingredients, but their just is just no faking frosting. And so, that being said, I will now for the 3rd time on this blog, give you the best frosting recipe I have ever tried! Enjoy...

Butter Cream Frosting:


3 sticks of butter softened
2/3 cup shortening

5-7 tbs heavy cream
2 tsp vanilla
2 lbs powdered sugar
1-3 tbs corn syrup

Mix shortening and butter together on medium until smooth.  Scrape down sides.  Turn mixer to low and add cream and vanilla.  Scrape down sides.  With mixer on low, slowly pour sugar into the mixture (you might need to increase the speed as you go.)  Once the sugar is mixed, scrape again and mix in corn syrup.

You may need more or less cream.  The corn syrup adds elasticity and shine to the frosting and is optional.
I don't know about you, but for me, making frosting is a messy process!


Friday, September 2, 2011

Brownie Sandwich Cookies


From Megan's kitchen


I have been raving about these cookies to friends and family for months...well, maybe not that long, but ever since my sister-in-law sent this recipe along to me. Even though these cookies came highly recommended by me, MY family failed to ever make them...so I was thrilled when I got to go visit and could bless them with this scrumptious treat. I thought they would be so delighted and overwhelmed by the amazingness of these cookies that they would feel indebted to me and want to serve me, but no such luck. Actually, I was quite disappointed when my cookies came out of the oven completely flat (instead of the perfect thick cookie I am able to achieve in Alaska) and the filling was super soft and not easy to work with. How embarrassing! Despite my disappointment, everyone reassured me that they enjoyed them and we served them at my sister's Bridal Shower. We took pictures, but I have yet to see how they turned out and I could not wait to get home and take pictures of what they are really supposed to look like. So enjoy!

Brownie Sandwich Cookies:

COOKIES:
1 cup butter (softened)
3/4 cup brown sugar
1 cup sugar
1 tsp. vanilla extract
2 eggs
1/2 tsp salt
1-1/4 cup cocoa powder
1-3/4 cup flour
1 tsp baking powder
1 tsp baking soda

Heat oven to 350 degrees. In a large bowl, cream butter, brown sugar and sugar until light and fluffy. Add the vanilla and then the eggs beating in one at a time. In a separate bowl, combine salt, cocoa, flour, baking powder,  and baking soda. Gradually add this to the cream mixture. 

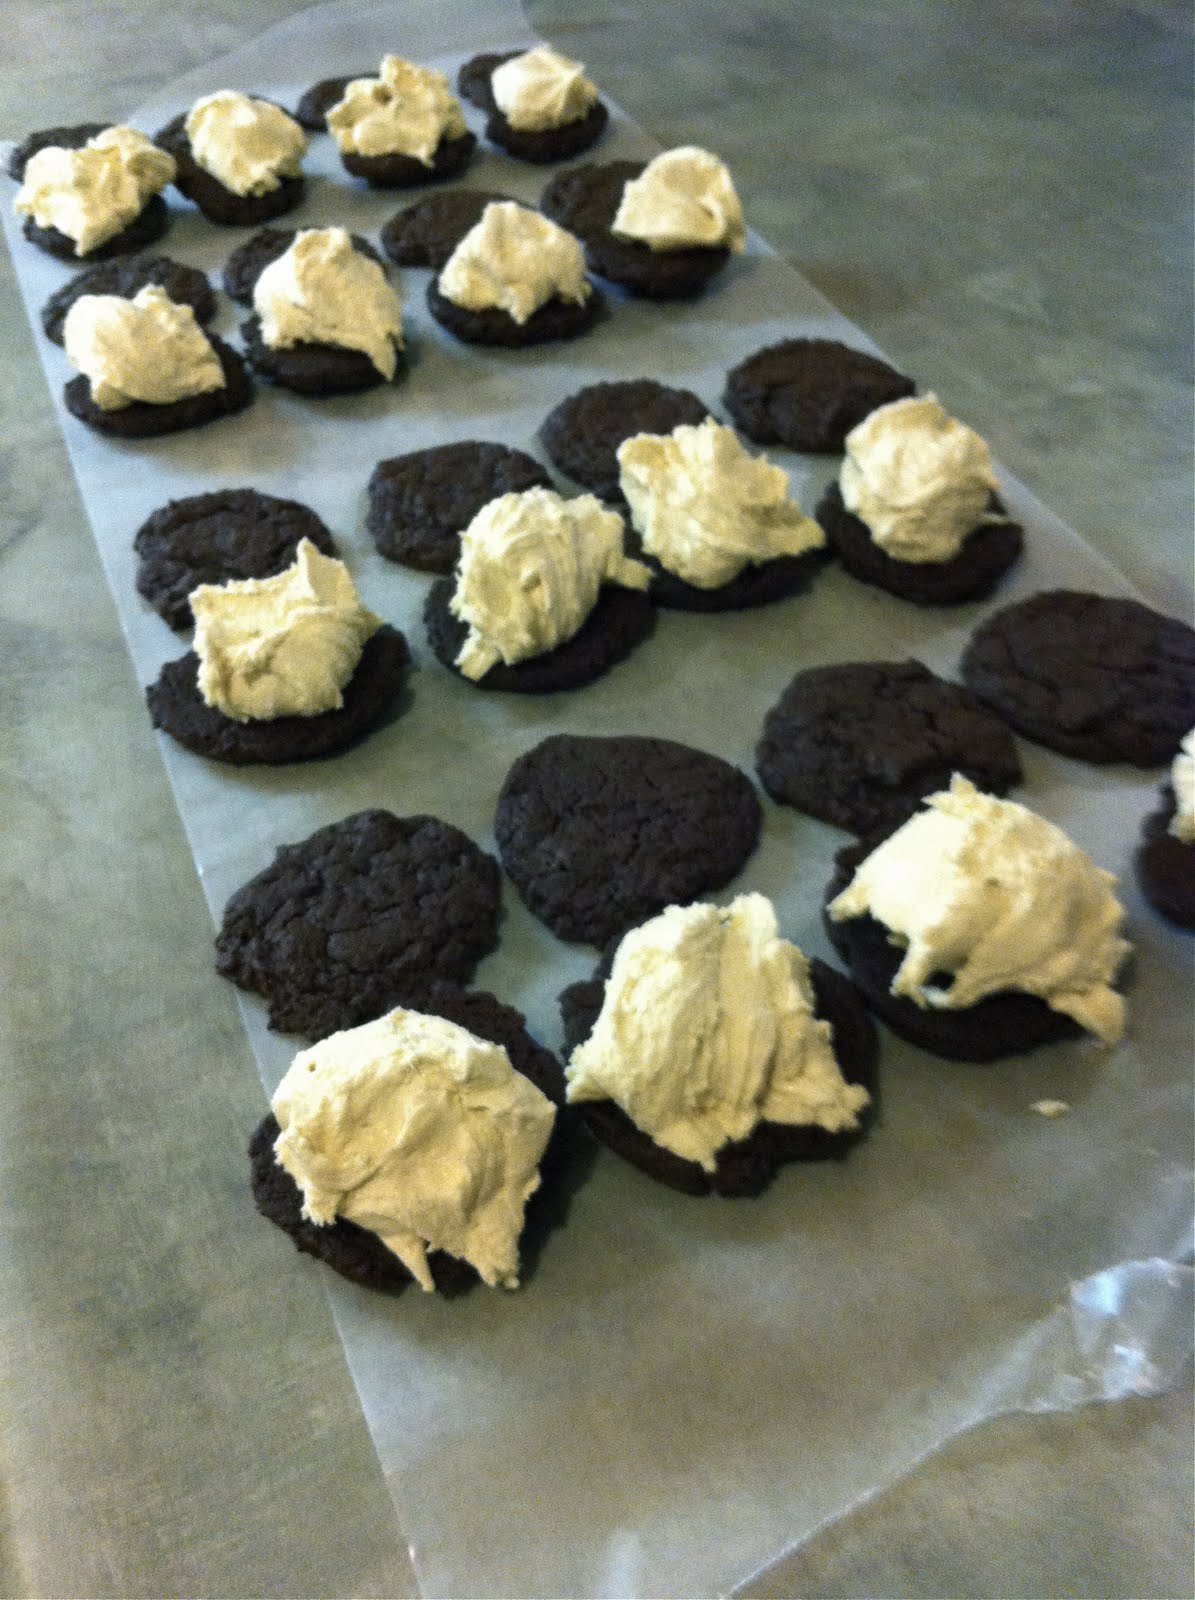
Spoon dough onto baking sheet and flatten slightly with your palm. 
Bake 8-10 minutes or until the cookies are puffy and the tops are cracked but still soft. Allow cookies to cool completely.

Ok, now it's time for the best part of the cookie...the filling!

The Filling:
1 cup butter (softened)
2 tbsp brown sugar
2-1/2 cups flour
1 container (13 oz) of marshmallow creme
1 tsp. vanilla
1/2 tsp salt

In a VERY deep bowl (trust me! this part can get messy...) beat the butter till nice and fluffy. Beat in brown sugar and then gradually add the flour till all of it is incorporated. Your mix will be very crumbly. Add the remainder of the ingredients. When you add the marshmallow creme, mix it in a little with a spoon a tiny but before using your mixer or that nice sticky substance will climb and spread mess all over everything. :)
Once mixed it will be a very thick filling that you can mold slightly with your hands.

To Assemble:
Before filling ANY of the cookies, make sure they are all cooked and cooled. You will want to fill them all at the same time. Match your pairs up flip over one half of them.
 Divide the filling evenly between all the pairs. The reason you do them all at the same time is because you will VASTLY underestimate the amount of filling each cookie gets. And, once you sandwich these cookies, there is no getting them apart again!


    Parties and Patterns . 2019 Copyright. All rights reserved. Designed by NlinkSolution